AI Agent Component Spec
AI Agent Component Spec
| Field | Value |
|---|---|
| Package | cometchat_chat_uikit |
| Init | CometChatUIKit.init(uiKitSettings) — must resolve before login() |
| Login | CometChatUIKit.login("UID") — must resolve before rendering widgets |
| Order | init() → login() → render. Breaking this order = blank screen |
| Auth Key | Dev/testing only. Use Auth Token in production |
| Calling | Optional. Install cometchat_calls_uikit to enable |
| Platforms | iOS 13.0+, Android API 24+ (with calling) |
Prerequisites
You need three things from the CometChat Dashboard:| Credential | Where to find it |
|---|---|
| App ID | Dashboard → Your App → Credentials |
| Auth Key | Dashboard → Your App → Credentials |
| Region | Dashboard → Your App → Credentials (e.g. us, eu, in) |
Step 1 — Create a Flutter Project
Step 2 — Install the UI Kit
Add to yourpubspec.yaml:
pubspec.yaml
android/app/build.gradle:
build.gradle
ios/Podfile:
Podfile
Step 3 — Initialize CometChat
Create a constants file and initialize the UI Kit before anything else.lib/cometchat_config.dart
lib/main.dart
Step 4 — Login
After init resolves, log the user in. For development, use one of the pre-created test UIDs:cometchat-uid-1 · cometchat-uid-2 · cometchat-uid-3 · cometchat-uid-4 · cometchat-uid-5
getLoggedInUser()checks for an existing session so you don’t re-login unnecessarily.- Widgets must not render until login resolves — use a state flag to gate rendering.
For production, use
loginWithAuthToken() instead of Auth Key. Generate tokens server-side via the REST API.Step 5 — Choose a Chat Experience
Integrate a conversation view that suits your app’s UX. Each option below includes a step-by-step guide.Conversation List + Message View
Two-panel layout — conversation list with navigation to messages. Think WhatsApp or Telegram.- Stack-based navigation with
Navigator.push() - Switch between one-to-one and group conversations
- Real-time updates and message sync across sessions
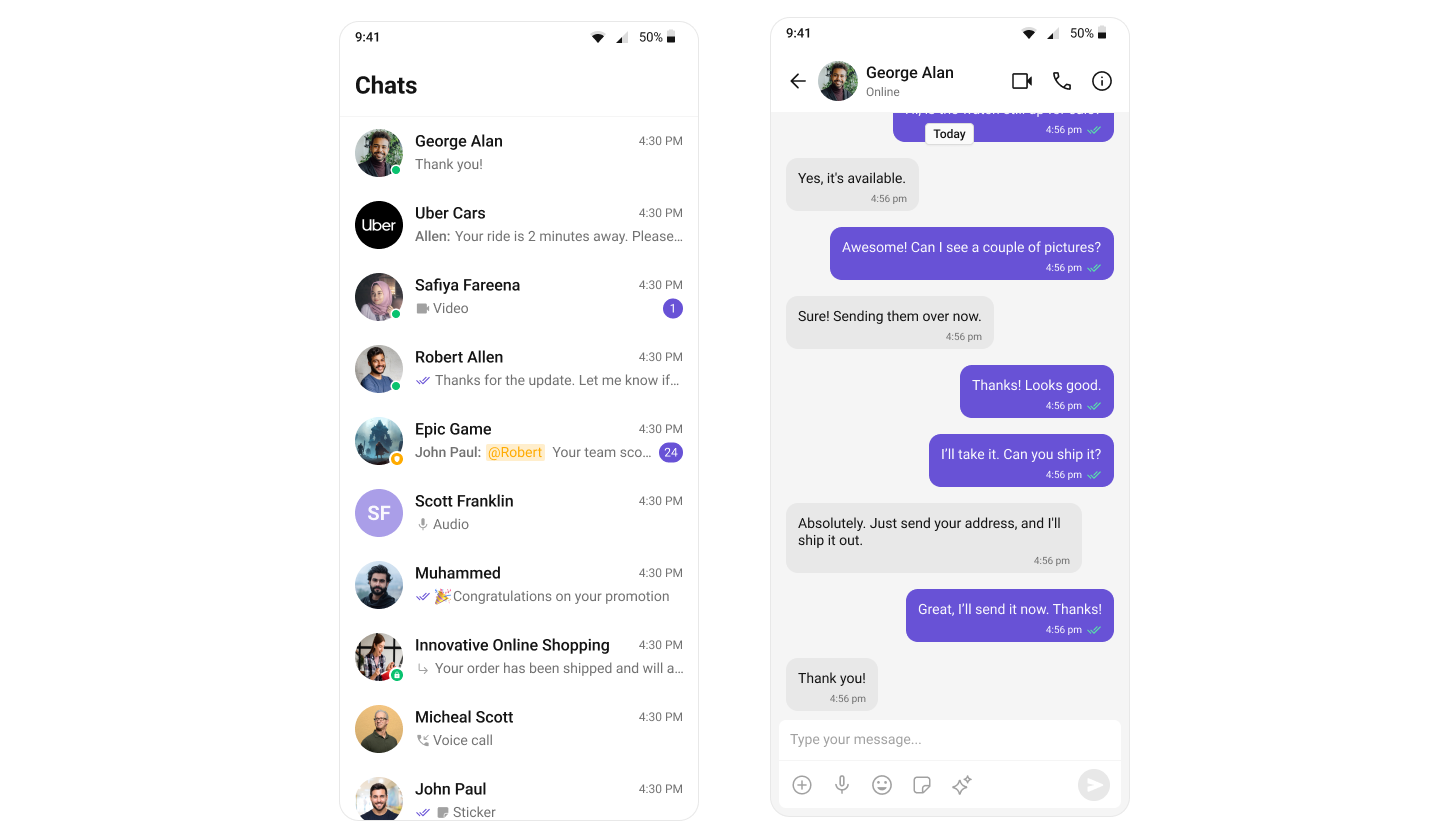
Build Conversation List + Message View
Step-by-step guide to build this layout
One-to-One / Group Chat
Single chat window — no conversation list. Good for support chat, embedded widgets, or focused messaging.- Dedicated chat window for one-on-one or group messaging
- No conversation list — users go directly into the chat
- Ideal for support chat or contextual messaging
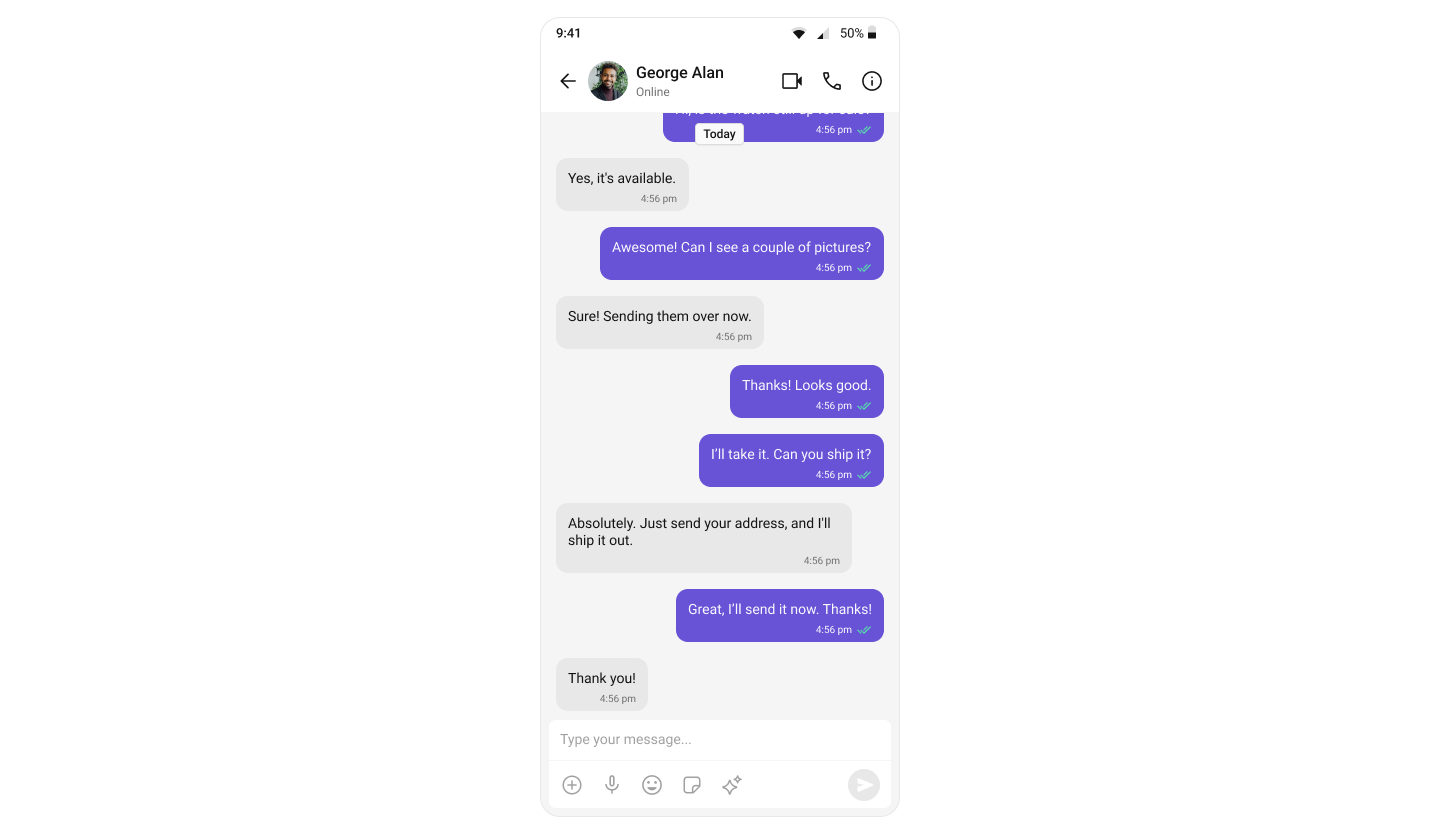
Build One-to-One / Group Chat
Step-by-step guide to build this layout
Tab-Based Chat
Tabbed navigation — Chat, Call Logs, Users, Groups in separate tabs. Good for full-featured apps.BottomNavigationBarwith independent screens- Unified experience for conversations, call history, and contacts
- Scales well for adding future features
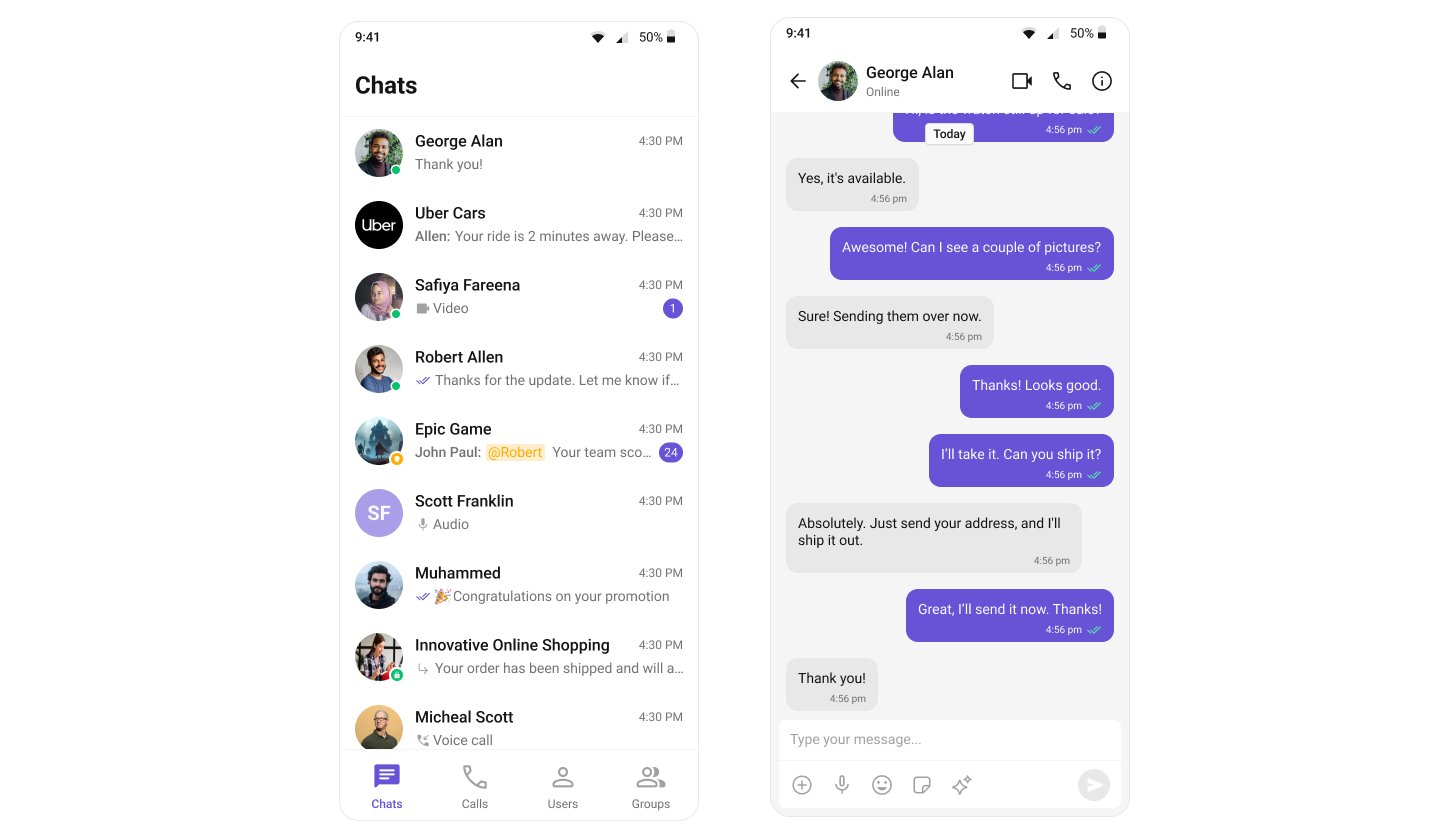
Build Tab-Based Chat
Step-by-step guide to build this layout
Build Your Own Chat Experience
Need full control over the UI? Use individual widgets, customize themes, and wire up your own layouts.- Sample App — Working reference app to compare against
- Components — All prebuilt UI widgets with props and customization options
- Core Features — Messaging, real-time updates, and other capabilities
- Theming — Colors, fonts, dark mode, and custom styling
- Build Your Own UI — Skip the UI Kit entirely and build on the raw SDK